HOW TO LAY A PATIO
Our easy, step-by-step guide to ensure you lay the perfect patio.
How to lay a patio
Building a patio can be a great way to update your garden with a low-maintenance space for relaxation and entertaining friends. Check out our step-by-step guide below from with helpful tips on how lay your own patio.
What tools do I need to lay a patio?
- Cement mixer (optional)
- Wheelbarrow
- Wacker plate
- Shovel
- Rake
- Pointing trowel
- Rubber mallet
- Spirit level
- Tape measure
- Cable avoidance tool (CAT)
- String line and pegs (optional)
- Hammer
- Bolster chisel
- Pressure washer (optional)
- Angle Grinder fitted with stone-cutting disc (if slabs need cutting)
What materials do I need to lay a patio?
- Paving slabs
- Building Sand
- Cement
- MOT Type 1 or Hardcore
- Off-cut piece of timber
What PPE safety equipment do I need for laying a patio?
- Safety goggles
- Rigger gloves
- Ear defenders (required for wacker plate / angle grinder)
- Dust mask
- Knee pads
- Steel toe-capped work boots
Planning & preparation before you start laying a patio
To ensure you get the best finish possible for your DIY project, please read our check list below for planning, preparation and safety precautions to be carried out before starting to lay paving slabs.
- Before you start laying a patio, you should use a CAT tool to make sure there are no hidden cables or pipes where you intend to excavate.
- Make a detailed plan with precise measurements (pave around manhole covers).
- Your patio must be layed at 150mm below the damp proof course of the house.
- For rainwater run-off away from the house a 1:60 (16mm per metre is recommended).
- If the patio joins your lawn, it should sit 10mm below ground level for ease of mowing.
- Keep materials and sharp tools out of children’s reach.
- Safety goggles and dust mask should be worn to protect against dust.
- Protective rigger gloves should be worn, protection when handling slabs.
- Steel toe-capped work boots, protect against heavy slabs and sharp tools.
How to lay a patio for beginners
Step 1: Measure your patio area
Calculate the area of your desired patio in square metres (if you’re using single slabs, then you can divide the area of your patio by the area covered by one pack).
You may want to leave a gap around the side for plants, or ensure it reaches your washing line for summer clothes drying, so bear all this in mind.
Step 2: Mark out your patio area
Outline the patio area from your plan with a building square and string. Use pegs to keep the string in place.
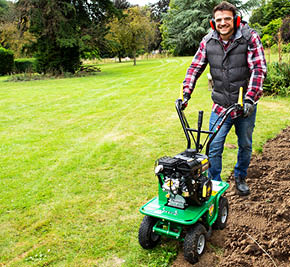
Ensure each corner of the patio area is marked 90° square. Mark out the maximum digging depth (the patio should sit 1cm below any grass). Then, dig out the grass with a shovel to outline the area.
Step 3: Prepare a patio base
Rake a layer of hardcore to a depth of around 50-80mm across the patio foundation. Hire a wacker plate to flatten the hardcore surface to do the job quickly and efficiently.
Apply a level of bedding mortar over the compacted hardcore foundation when set. Hire a concrete mixer if making your own mortar (mix of 6 parts sand to 1 part cement).
Mix together with water to make it damp and workable.
Step 4: Lay paving slabs
Check with your builder’s square that the string guide lines are in their correct position.
Align the first slab to your guideline at the corner of your patio area. Lay down and align all slabs in their correct positions, tap slabs with a hammer to set them into the bedding mortar (use off-cut piece of timber to protect slab surface).
Step 5: Fill in the gaps
Mortar will prevent your slabs from moving and stops weeds from growing in the gaps.
Prepare your mortar mix 4 parts sand to 1 part cement and mix it slowly adding a little water at a time to get a smooth, damp consistency (as before you can use a concrete mixer to make your mortar).
Leave your mortar to dry for at least 24 hours before filling in the gaps. Use the edge of a pointing trowel to press your mortar into the gaps.
Use a brush to wipe off any surplus mortar. Wash the slabs with water using a damp sponge to remove any remaining cement.
Step 6: Let your mortar dry before using your patio
- Wait 24 hours after finishing your patio before using it.
-
Speedy Tip! To keep your patio in tip top condition use a pressure washer on a low setting to clean any surface stains.


