How to Install a Stair Runner
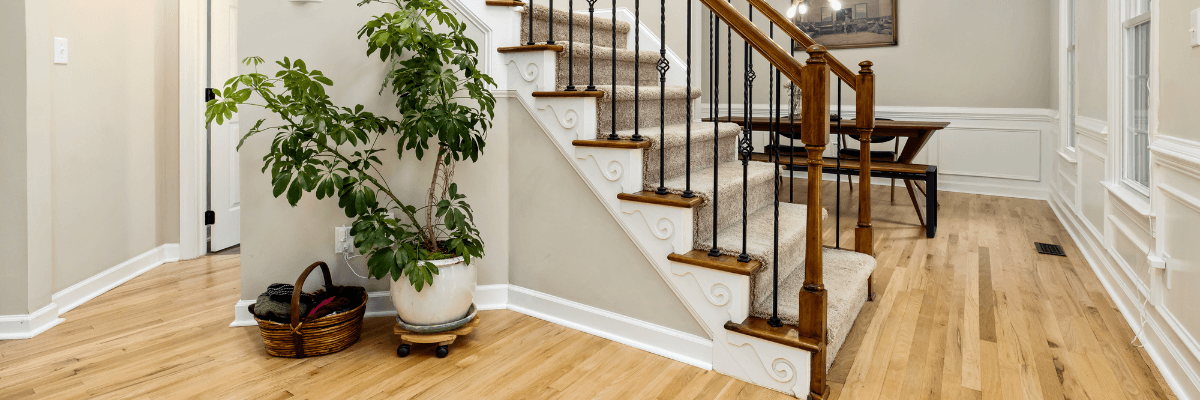
Stair runners are the perfect in-between of not having fully carpeted stairs yet keeping the noise-dampening effects of carpet.
They’re also a really aesthetic option, with a wide choice of patterns, colours, and fabrics available. It can look fresher than a full carpet, too.
You can easily fit your own runner at home, using the right equipment and a bit of patience.
Measuring your stairs
Before you do anything, remove the current carpet and the tacks, and then measure your stairs. You want to know how long the runner will have to be, and how wide it will ideally be. Find the centre of your stairs and mark it with decorator’s tape.
If the centre is hard to find, work out on a step-by-step basis where you want the runner to sit.
To get the length your runner needs to be, measure the depth of your step, plus the height of the riser (bit between each stair). Take into account any protruding parts on each step, such as rounded edges. Multiply this measurement by however many steps you have and add an additional 30cm to this for good measure.
If you want to be extra cautious, such as if you have an older house with uneven stairs, you can measure every step depth and riser height.
Now you’re ready to fit your new runner.
How to Install a Runner: Step-by-Step Guide
You will need:
- Sander
- Filler
- Hammer
- Vacuum cleaner
- Paint
- Stair grippers/tack strips
- Staple gun
- Underlay
- Nails
Always wear PPE when carrying out any DIY. You will need gloves, eye protection, and safety work boots for this task. You should also wear a mask when sanding.
Step 1: Clean the stairs
Once the old carpet and tack strips are up, use a vacuum cleaner to clean the stairs and remove any dust and leftover fibres.
Step 2: Sand and fill
With a small orbital sander, sand back the stairs so they feel smooth and even. You don’t want to have any rough wood showing, and sanding will also ensure the paint adheres to the rougher surface better.
Using a standard filler, fill in any holes. This may be where the tacks were, or any scuffs in the wood from over the years.
Allow to dry and repeat if needed. Sand once dry. Vacuum and clean the stairs again before painting.
Step 3: Paint
If installing a runner, you probably want either side of your step to be painted. For ease and quickness, you can hire a paint sprayer. This will get the stairs done in no time and allow you to paint thin layers which have less chance of scuffing and chipping over time.
But using a small roller or paintbrush can help if you don’t want to paint the whole step in order to save paint.
Before you paint, you might want to use a base coat which will maintain the paint for longer. A top seal coat can also help if there is a risk your household may stray from using the runner!
Step 4: Install tack strips
To ensure your runner stays where it is, nail carpet or stair tacks/grippers to each stair, around 1-2” away from each riser. For security, it is also a good idea to install tack strips to each riser, approximately 1” up from each step.
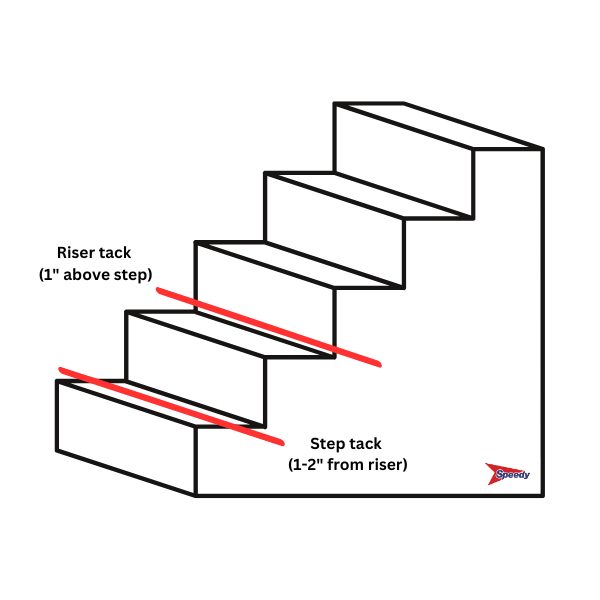
You can buy grippers in the correct size for a runner. However, if you’re using your old grippers, cut them to size, so they only are as long as the runner will be.
The tack strips should sit right at the base of each riser.
Then use your hammer to nail the gripper onto each stair. Be careful, as the tacks can be sharp. Wear gloves and eye protection, as well as safety boots.
Step 5: Fit the underlay
Now is the time to lay the underlay doing so.
This is optional but will help soundproof and cushion the runner. You only need to fit underlay on the steps, not on the riser, so cut it to size using scissors beforehand. These rectangles should be 100mm (4”) smaller than your runner.
Ensure the underlay is snug to the tack strips, but don’t overlap it – the tacks are purely to keep the runner carpet in place.
Secure with a staple gun to the stairs.
Step 6: Install the stair runner
Start at the bottom of the stairs. Work out which way the pile runs; it should go down the riser, so it catches less dirt and is easier to clean.
Stretch the runner and push down with your hand onto the tacks, ensuring the carpet feels secure. This will ensure the runner stays in place. Keep an even tension, and check all edges are neat.
Once you reach the top, fold the runner back on itself to create a neat edge, or use a runner binder. The end usually sits under the top step, where your flooring for the landing will start.
READY FOR MORE DIY TIPS?
Hopefully, you’re now ready to install your very own stair runner using our advice, with all the tools you need available to hire or purchase from Speedy Hire.
Open a Speedy account online or on the app for all your tool hire needs.
Speedy has more than 200 local service centres across the nation, hire counters in selected B&Qs and nationwide 4-hour delivery. It has never been easier to hire the tools and equipment you need.
For more tips subscribe to our YouTube Channel
Find ideas on Instagram
- 2024
- 2023
- December 2023 (13)
- November 2023 (9)
- October 2023 (7)
- September 2023 (10)
- August 2023 (20)
- July 2023 (21)
- June 2023 (17)
- May 2023 (17)
- April 2023 (16)
- March 2023 (14)
- February 2023 (15)
- January 2023 (7)
- 2022
- December 2022 (6)
- November 2022 (12)
- October 2022 (24)
- September 2022 (14)
- August 2022 (12)
- July 2022 (15)
- June 2022 (18)
- May 2022 (14)
- April 2022 (9)
- March 2022 (5)
- February 2022 (5)
- January 2022 (2)
- 2021
- December 2021 (7)
- November 2021 (10)
- October 2021 (1)
- September 2021 (1)
- August 2021 (3)
- July 2021 (3)
- June 2021 (4)
- May 2021 (1)
- April 2021 (1)
- March 2021 (2)
- February 2021 (1)
- January 2021 (1)
- 2020
- 2019
- 2017
- 2016
- 2014
- 2013
- 2012
- 2011


