How to Fit Curtains
Curtains don’t only block out light, but can really boost the look of a room too. From bringing together patterns to softening a window, curtains are a great addition to any room.
They can be easier to install than blinds and are often a cheaper alternative too. With loads of patterns out there, you can find one which suits your space.
The below should be used as a guide. Your chosen curtain pole should come with its own instructions based on the brackets and weight.
You will need:
- Tape measure & Spirit level
- Pencil
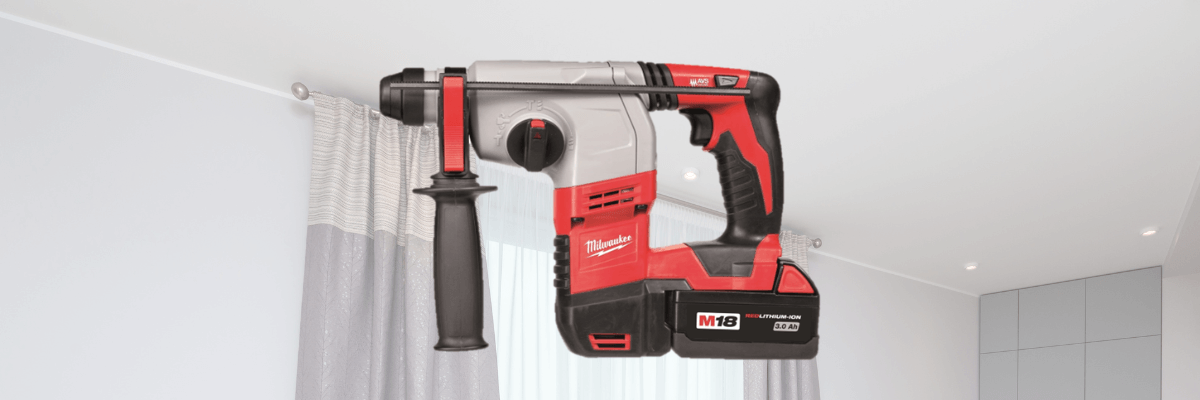
- Drill
- Drill bits
- Wall plugs
- Screwdriver
Because this job involves drilling into a wall, check first with a cable detector to ensure no pipes or wires are running behind the wall. You can hire multi-detectors from Speedy.
Always wear PPE when drilling, too. Eye protection, a mask, and work gloves are all required. These can be purchased from Speedy at the time of hire, or from your local service centre.
How to Measure for a Curtain Pole
The first step is to measure your space. You need to measure the height and width of your window and where you want the curtains to stop above the floor. This will allow you to purchase the correct size.
The width of your window will also determine whether you need a single curtain or a pair.
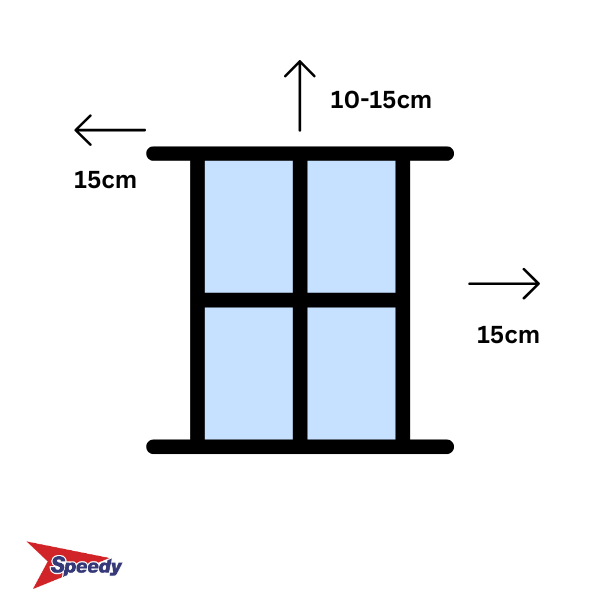
Using your tape measure, record the height and width of your window area. Measure the width of the window recess – your fitting should extend to about 15cm on each side to block out the light, so add 30cm to the overall measurement. This is the length of your pole.
Most poles will sit a minimum of 10-15cm above the window. Measure from the top of your window. This is the placement of your pole and the height of your curtains.
Floor-length curtains should generally sit around ¼” off the floor, so they aren’t dragging yet still block the light, but you may wish to keep them further off the ground depending on your window.
You may wish to raise your pole further if you want to create the illusion of a taller room, or if you want to make the most of your wall height.
How to Put Up a Curtain Pole
Step 1: Mark your holes
You want to have at least three brackets to support your curtain pole. With a pencil, mark the centre point of your window, then 10-15cm above the top of the window (or at the chosen height your curtain pole will sit).
Then at this same height, mark 15cm on either side of your window. Ideally use a spirit level to mark your line or cross, to ensure the pole will sit level.
Take your curtain pole brackets, and mark any further holes required. Most will need two screws, so use your current marks for the top screw holes as this will be where your curtain pole will sit.
Step 2: Drill your holes
Take your time here, ensuring the drill is nice and level. If you are drilling into masonry, you will need a hammer drill. Most windows will be on a masonry wall as they are external.
Use the correct drill bit size for your curtain pole brackets and screws, which should come with your pole.
Once all the pilot holes are drilled, fit your wall plugs. These should push in, but tap with a hammer to make sure they’re flush if they’re a bit tight.
Step 3: Screw on the brackets
Position the brackets over the wall plugs, before inserting a screw and tightening using a screwdriver or your drill.
Don’t tighten them up all the way just yet. Loosely place your pole on all three brackets once in place, and double-check with a spirit level that everything is straight.
If it is level, tighten the bracket screws fully.
Step 4: Adjust the pole
Most curtain poles are adjustable, but you may have to cut yours to length. Ideally, purchase the size closest to your window measurements. Follow the instructions on how to adjust your chosen pole.
Fit the pole so it sits centrally.
SPEEDY TOP TIP: It is easiest to fit eyelet curtains or curtain rings onto the pole before it is on the bracket, to save you having to remove everything again. Just feed them onto the pole, leaving one ring outside the bracket to keep the curtains in place.
Tighten any bracket screws holding the pole in place once it is in the correct position.
Step 5: Fit the finials
The finials are the décor on the end of your pole, which makes the pole look nice, keeps the curtain end in place, as well as preventing any edges from being visible.
Loosen the small screw on the finial, slide it onto the pole, and tighten the screw again using a small screwdriver. Depending on your curtain pole, this may instead require an allen key.
If using curtain rings, you can now fit your curtains by hooking them onto the curtain hooks.
READY FOR MORE DIY TIPS?
If you’re carrying out your own DIY to transform your home, look no further for the advice and tools you need.
For inspiration, we have a blog with guides and how-tos on everything from indoor renovations to gardening. Browse our full range of hire products on our website or our app.
You’ll find all the hire equipment required at Speedy Hire. Why not start planning your next DIY project and open a Speedy account online or on the app for all your tool hire needs?
Speedy has more than 200 local service centres across the nation, hire counters in selected B&Qs and nationwide 4-hour delivery. It has never been easier to hire the tools and equipment you need.
For more tips subscribe to our YouTube Channel
Find ideas on Instagram
- 2024
- 2023
- December 2023 (13)
- November 2023 (9)
- October 2023 (7)
- September 2023 (10)
- August 2023 (20)
- July 2023 (21)
- June 2023 (17)
- May 2023 (17)
- April 2023 (16)
- March 2023 (14)
- February 2023 (15)
- January 2023 (7)
- 2022
- December 2022 (6)
- November 2022 (12)
- October 2022 (24)
- September 2022 (14)
- August 2022 (12)
- July 2022 (15)
- June 2022 (18)
- May 2022 (14)
- April 2022 (9)
- March 2022 (5)
- February 2022 (5)
- January 2022 (2)
- 2021
- December 2021 (7)
- November 2021 (10)
- October 2021 (1)
- September 2021 (1)
- August 2021 (3)
- July 2021 (3)
- June 2021 (4)
- May 2021 (1)
- April 2021 (1)
- March 2021 (2)
- February 2021 (1)
- January 2021 (1)
- 2020
- 2019
- 2017
- 2016
- 2014
- 2013
- 2012
- 2011


