How To Build A Garden Bed
Raised beds are perfect if you don't have an existing area for plants or want to add extra planting opportunities without too much groundwork.
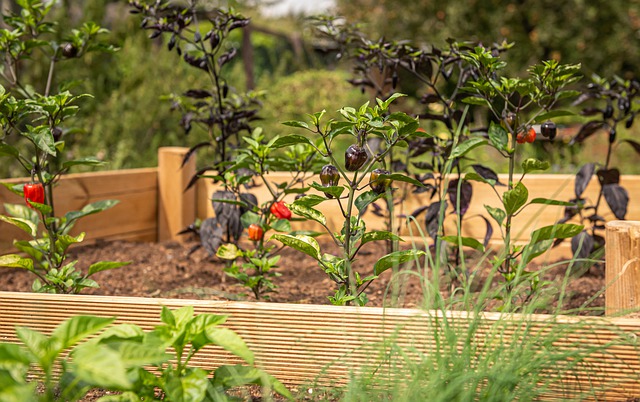
They give you quite deep soil, great for growing fruit and veg. It is also easy to cover them in winter or with netting in summer to keep pests and butterflies away.
Thankfully, it is quite easy to make a raised bed using wood sleepers and the right tools available to hire from Speedy Hire.
What you need to build a raised bed
The great thing about raised beds is that they have a big impact but are inexpensive and easy to DIY. You need some timbers and garden soil, and you’re good to go. Pressure-treated wood, which is rot-resistant and protected against decay and pests, should be used.
Hiring your tools from Speedy Services also means you get the best tools for a quality finish without storing them afterwards.
You will need:
- Timber, such as softwood sleepers
- Weed membrane
- Spirit level
- Measuring tape
- Drill
- Coach screws
- Timber sleeper corner brackets (optional)
Before you begin
Prepare the area you will be building the raised bed on. It needs to be flat and level to ensure stability. Your timber frame should also be flush to the ground so no soil escapes, keeping your flowers or vegetables stable.
Dig out any turf that would sit below the raised bed. You don’t want grass growing up through. Treat the area for weeds a week before building your raised bed. If you want to be on the safe side, we advise lining the area with a weed membrane.
- SPEEDY TOP TIP! Raised beds are great if the soil in your garden is clay-like or low quality and you don’t want to get rid of it all to replace with compost.
You can add a wooden raised bed to patio stones if you only have a yard outside and want a vegetable garden. Again, we’d advise lining between the flagstones and the raised bed, which will keep your patio clean if you ever move the bed.
How to create a raised bed in your garden
Measure the area you want your raised bed to be so you know which length timber sleepers to buy. Also, consider height – something with large roots will need very deep soil, so you will need wide sleepers. You may need to double up on timbers to increase height.
Always wear the correct PPE when carrying out any DIY task. For this job, some gloves and safety goggles will be needed.
Step 1: Choose the desired timber size
Choose your desired timber size. You can buy different lengths of timber/sleepers that are already pre-cut or get them cut to size by your local supplier.
Step 2: Lay the timbers
Position your wood in its rough frame shape and check they are all level using your spirit level. Adjust the ground if needed. Using your tape measure, check there is even spacing between each end so your bed is perfectly square or rectangular.
Step 3: Connect the timbers
Once everything is in place, drill through the end timbers into the adjacent pieces using your long, heavy-duty coach screws. You should have one screw at the top and one at the bottom as a minimum. Continue until all four pieces are affixed, checking everything remains level as you go.
Step 4: Increase the height
Most people will need something deeper than one timber width high. Research what you’re planting to see if it will form a deep root. If so, you need a lot of soil.
Arrange the next set of timbers and repeat step 3 to attach them together before lifting on to the top of the existing frame. Everything should remain stable once filled with soil, but if you want to be extra cautious, fix the top timbers to the base timbers with timber railway sleeper corner brackets.
Repeat this step if you need even more height.
Step 5: Fill your garden bed
Your bed is almost ready! Now, to fill it. Think about drainage first. You may need to place items at the base if you need good drainage.
Try to avoid rocks and rubble, as this can hold excess moisture. Old wood (or even wood chips) or any clumpy soil you’ve removed from elsewhere in the garden is better. Ask neighbours and friends if they’re getting rid of any to save them a trip to the recycling centre!
How deep is your raised bed? It could be expensive to fill with good quality compost, so don’t be afraid to add garden waste or organic matter such as grass clippings, dry leaves, or trimmings from other plants, at the bottom. Then, use topsoil.
As these break down over time, your bed will lose height, but buying fresh compost every year to use as topsoil is more cost efficient than buying loads of bags at the start of your journey. Carefully think about the soil type you need, as well. Vegetables will need plenty of nutrients.
Now add your plants or vegetables, completely covering the plant roots. Ensure everything has enough room to thrive for years to come. And congratulations – you have just built a raised bed!
Is there power tool hire near me?
Yes. At Speedy Hire, with over 3000 professional quality tools which will help get the job done quicker and to a higher finish, without having to buy and store new tools. Speedy has more than 200 service centres nationwide, hire counters in selected B&Qs and nationwide 4-hour delivery.
Open a Speedy account today online or instore to continue your DIY journey.
- 2024
- 2023
- December 2023 (13)
- November 2023 (9)
- October 2023 (7)
- September 2023 (10)
- August 2023 (20)
- July 2023 (21)
- June 2023 (17)
- May 2023 (17)
- April 2023 (17)
- March 2023 (14)
- February 2023 (15)
- January 2023 (7)
- 2022
- December 2022 (6)
- November 2022 (12)
- October 2022 (24)
- September 2022 (14)
- August 2022 (12)
- July 2022 (15)
- June 2022 (18)
- May 2022 (14)
- April 2022 (9)
- March 2022 (5)
- February 2022 (5)
- January 2022 (2)
- 2021
- December 2021 (7)
- November 2021 (10)
- October 2021 (1)
- September 2021 (1)
- August 2021 (3)
- July 2021 (3)
- June 2021 (4)
- May 2021 (1)
- April 2021 (1)
- March 2021 (2)
- February 2021 (1)
- January 2021 (1)
- 2020
- 2019
- 2017
- 2016
- 2014
- 2013
- 2012
- 2011


